Share reliance wimax broadband using a Linksys WRT54G Wi-Fi router is easy. Follow the below steps.
Connect the ethernet (RJ-45) cable coming out from Power over Ethernet (POE) to WAN port of the router.
Connect your network card of desktop PC or Laptop to any of the LAN port of the router.
Switch ON the power to POE
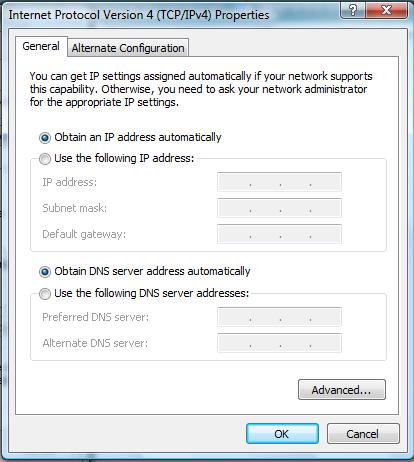 |
Go to >>>Control panel >> Network >> Local Area Connection >>> Properties >>> Internet Protocol (TCP/IP) >>> Properties >>> Select obtain IP address automatically>>>Select obtain DNS Server address automatically>>>click on OK.
|
Go to Command prompt and type "ipconfig" you should get the details as below
Ethernet adapter Local Area Connection:
IP Address. . . . . . . . . . . . : 192.168.1.100
Subnet Mask . . . . . . . . . . . : 255.255.255.0
Default Gateway . . . . . . . . . : 192.168.1.1

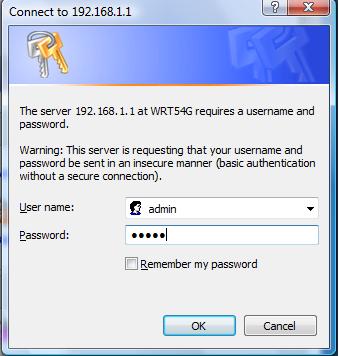
Open your browser (IE / Firefox) and type 192.168.1.1 in the address bar and press ENTER
It will prompt for username and password type “admin” for both username and password.
If you are using Reliance Broadband Single user/ Consumer plan
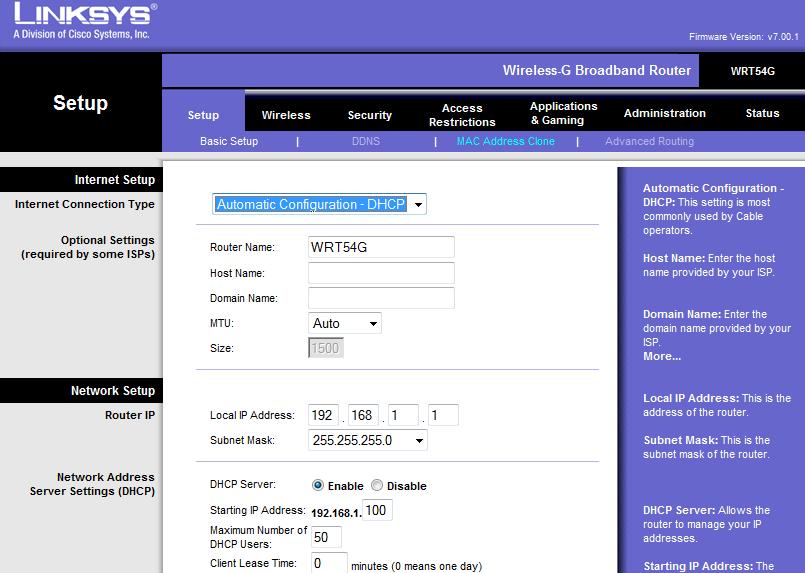
Go to >>> Basic Setup Under Setup >>>Internet Connection Type >>> Automatic Configuration -DHCP and then
Slect Time Zone GMT+5.30 Bombay, New Delhi for India>>> Save Settings
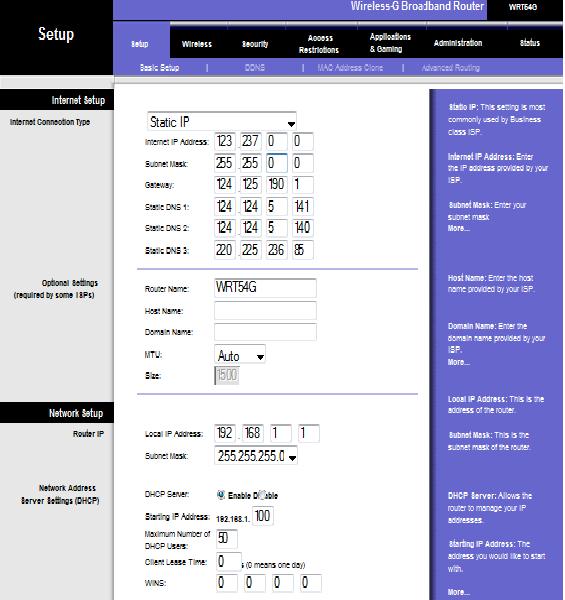
If you are using Reliance Broadband Multi user/ SME (Business) plan
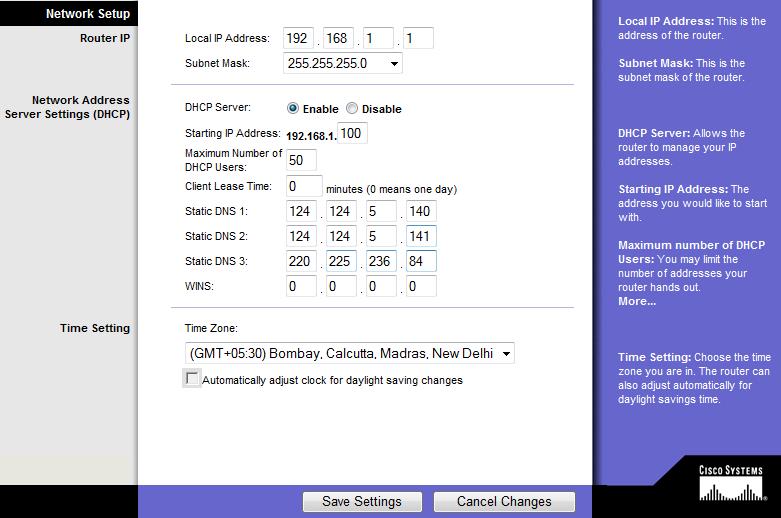
Go to >>> Basic Setup Under Setup >>>select the Internet Connection Type to Static IP enter the IP Address, subnet mas, Gateway Address and DNS Server IP Address that you receive from Reliance
and then Slect Time Zone GMT+5.30 Bombay, New Delhi for India>>> Save Settings
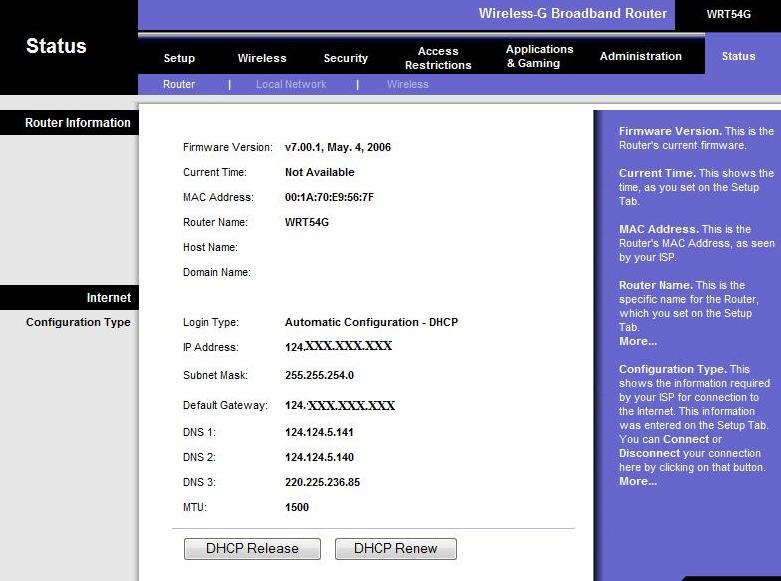
Under Status >>> Router >>> you can see Reliance IP scheme in 123.xxx.xxx.xxx or 124.xxx.xxx.xxx as below
Login Type: Automatic Configuration - DHCP (for Consumer configuration)
IP Address: 123.xxx.xxx.xxx
Subnet Mask: 255.255.xxx.0
Default Gateway: 123.xxx.xxx.1
DNS 1: 220.225.236.84
DNS 2: 220.225.236.85
DNS 3: 202.138.96.47
MTU: 1500
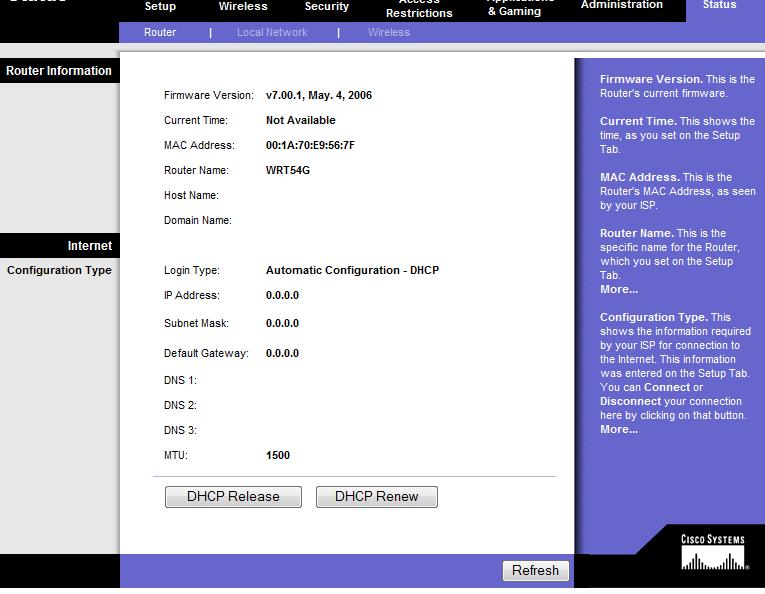
If you get IP Address , Subnet Mask and gateway as all Zero "0" as shown below, ensure POE is ON and click on DHCP Renew button, you should see reliance IP Address.
Once you get reliance IP Address, Netmas, gateway address, DNS server IP address open IE new window go to http://www.reliancebroadband.co.in and attenticate your userid and password to go to internet sites.
Thats it, you have done it. Congrats and Happy surfing!!!
|